
If you are hosting a community in Mighty Networks then you understand how important it is to track information regarding your members. But the manual export and upload of information can be a time waste for any community leader.
This blog will cover how you can use Zapier to automate the transfer of new members information into your HubSpot account.
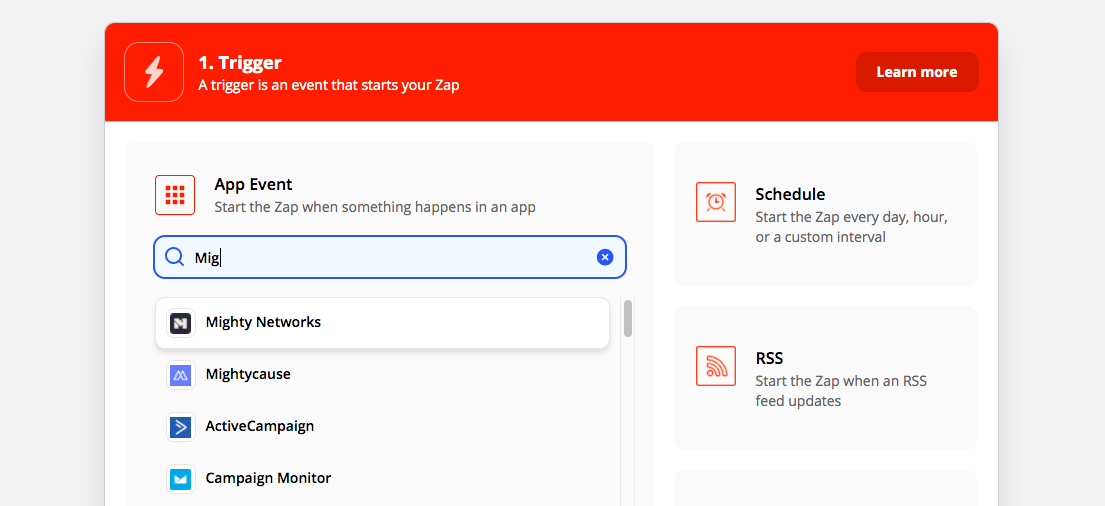
Set Up Your Trigger
1.) Choose your Mighty Network account as the application to trigger this transfer.
2.) Set the Trigger Event to be Member Action
3.) Grab your API code within Mighty Networks
.png?width=2103&name=API%20Key%20(1).png)
4.) Choose the member action: Member Joined
Choose the action that Zap will perform
This Action will be happening inside another app—HubSpot. Select HubSpot as the app and the corresponding Action is “Create New Contact.” This means that when the above Trigger happens (a new member joins your Mighty Network, or a Group or Course within it), the member’s information will be added to your HubSpot account.
1.) Select HubSpot as your app you are connecting to
2.) For Event Select: Create New Contact
3.) Select the information that you would like to be transferred to your HubSpot account. We recommend keeping the transfer simple and including contact name and email.
.png?width=1080&name=API%20Key%20(3).png)
3.) Test Action to make sure the transfer is correctly performing.
Create Next Action : Add Contact to List in HubSpot
Add your members to an static list in HubSpot to easily access your members for things like marketing emails, workflows, and dashboards specifically tracking member behavior, demographics and more. Your list must be created in HubSpot to perform this action.
.png?width=1080&name=API%20Key%20(4).png)
1.) Choose app & event: HubSpot Action Event: Add contact to list
2.) Choose account: Connect to your HubSpot portal
3.) Choose the list to add contacts to. Then select contact email to be added to the list.
Once you’re finished with this, you will be asked during this step to test the connection to ensure the data gets transferred properly. Then, Zapier will let you know that the Zap is ready to be turned on!
Ready to learn more about integrations like this to help your business grow? Then connect with a Hubspot Administrators here, and learn more about how we help companies grow and succeed.
*(updated 3/6/2023)